 THEREiS
Title :
Building an Astro Blog #3 - Putting a Theme on Your Blog
This post is translated from the Korean original. Read in Korean →
In the last post, I installed Astro and got a basic blog running from the blog template. What’s the biggest advantage of building your own blog? Being able to design it however you like. That’s how I could give this very blog, the one you’re reading this post on, the look of the old HiTEL days. Yes, a blog should be something you can decorate however you want. Of course, you shouldn’t end up focusing more on decorating than on writing.
You can code the whole design from start to finish like I did. But if that feels too hard and exhausting, you have no talent for design (not that this blog looks all that great design-wise), and you wish someone would just design it for you, another option is to grab a theme someone else made and dress up your blog with it.
Astro has the advantage of letting you decorate it however you like, but if you were expecting something like WordPress, where you click “Install theme” and everything changes in a flash, let go of that expectation now. Most Astro themes are not plugins but finished project templates. So rather than “installing” a theme, it’s more accurate to think of it as “moving” one side, either the theme or your blog, over to the other.
Where to find themes
On the themes page of the official Astro site, themes are grouped by category: blogs, portfolios, documentation sites, and more.
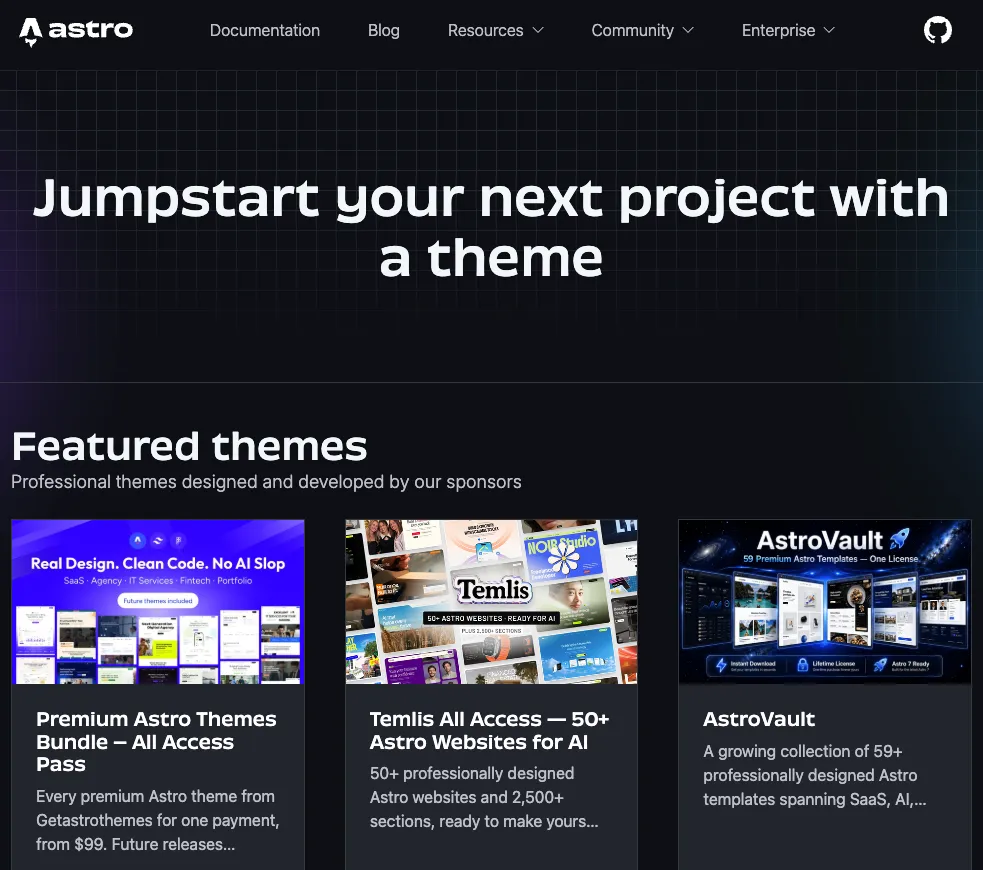
Free and paid themes are mixed together, so use the filters to narrow them down. Once you find a theme you like, there’s usually a GitHub repository link attached, so head over there and read the README first.
Besides the design, there are a few things you should always check when choosing a theme.
- Astro version: Check the
astroversion in the theme’spackage.json. If its major version differs from your blog’s, expect a lot of work. - Styling approach: Does it use Tailwind or plain CSS? If it’s a Tailwind theme, you’ll need to bring the related config along too.
- License: Check whether it’s an open source license like MIT and whether attribution is required.
- Recent commits: A theme that hasn’t been maintained for a long time may not build on the latest Astro.
Method 1. Move your posts into the theme project
This is the method I recommend most. If you’ve only just made your blog and haven’t changed much yourself, it’s the fastest and cleanest.
In the last post, we created the project with npm create astro@latest. Add the --template option, and you can create a project directly from a GitHub repository as the template.
# Create a new project using a GitHub repository as the templatenpm create astro@latest -- --template <github-username>/<theme-repo-name>The -- in the middle isn’t a typo. It’s a separator that tells npm “everything from here on is an option to pass to the Astro creation tool.”
Once the project is created, move your blog’s content over piece by piece.
Step1. Copy the post files
Copy the Markdown files under your existing blog’s src/content/blog into the theme’s content folder. Depending on the theme, the folder might be called blog or posts, so check the theme’s structure first. If the images in your posts live somewhere like src/assets, move them to the same relative path too so the images don’t break.
Step2. Match up the frontmatter
This is the most tedious part. Astro checks the format (schema) of your posts’ frontmatter in src/content.config.ts, and every theme uses different field names. For example, here’s what mine looks like.
schema: ({ image }) => z.object({ title: z.string(), description: z.string(), pubDate: z.coerce.date(), updatedDate: z.coerce.date().optional(), heroImage: z.optional(image()), tags: z.array(z.string()).default([]), draft: z.boolean().default(false), }),But a theme might use date instead of pubDate, or cover instead of heroImage. When that happens, you have two choices.
- Bulk-edit your posts’ frontmatter to match the theme’s format.
- Modify the theme’s schema and components to match your field names.
If you only have a few posts, option 1 is easier; if you have many, option 2. Either way, run npm run dev and any post with a mismatched format will be kindly pointed out in an error message, so just fix them one by one as you go.
Step3. Move the config and integrations
Check the following items in astro.config.mjs and move them over to the theme.
site: Your blog’s address. RSS and the sitemap use this value.integrations: Integrations you were using, like mdx and sitemap- Any other settings you added
Compare package.json too, and if there are packages you installed on top, install them in the theme with npm install as well. In my case, I had added things like comments (Artalk) and image zoom (medium-zoom), so those need to come along too.
Method 2. Bring just the theme’s design into your blog
If you’ve already bolted on lots of features and don’t want to tear down the project, you can go the other way and pull just the design-related files out of the theme.
In an Astro project, the places responsible for how things look are mostly fixed.
| Folder | Role |
|---|---|
src/layouts |
The overall page skeleton (header, footer, content area) |
src/components |
Pieces like the header, cards, and tag lists |
src/styles |
Global CSS |
public |
Static files like fonts, favicons, and icons |
Bring these folders over from the theme, then change the import paths so your page files (under src/pages) use the new layouts.
That said, this method takes more work than you’d expect. The theme’s components are built around the theme’s frontmatter field names, so you end up doing the same work as Step2 of Method 1, just inside the components. And if the theme uses Tailwind, installing and configuring Tailwind comes along with it.
Method 3. Merge the theme with Git
If you want to keep pulling in changes every time the theme author updates it, you can also register the theme as a Git remote and merge it.
# Create a working branch firstgit checkout -b theme-apply
# Register the theme repository as a remote and fetch itgit remote add theme https://github.com/<github-username>/<theme-repo-name>.gitgit fetch theme
# Merge unrelated historiesgit merge theme/main --allow-unrelated-histories
--allow-unrelated-histories is needed because your blog and the theme started out as separate projects. Fair warning: the first merge produces a huge number of conflicts. Expect almost every file to conflict. So always do it on a separate branch, and merge into the main branch only after you’ve resolved all the conflicts. Once you’ve gone through that pain, you can pull in later theme updates with git fetch theme and git merge theme/main.
Which method to choose
To sum up:
- You just made your blog and have barely customized it → Method 1
- You’ve added lots of features yourself and want to keep your project → Method 2
- You want to keep following theme updates → Method 3
Whichever method you pick, don’t forget to create a Git branch before you start. Theme work touches more files than you’d think, so you’ll feel much better knowing you can always go back.
Easy things to miss
Finally, here’s the checklist I went through after changing themes.
- Are post URLs unchanged?: I name my post files in the
yyyyMMdd_###.mdformat, and that file name becomes the post’s URL as is. If the theme uses a different path like/posts/instead of/blog/, all your existing links break. Either match the paths or useredirectsinastro.config.mjsto send old URLs to the new ones. - RSS and sitemap: Check the build output (the
distfolder) to make sure they’re generated correctly with the new URLs. - Images: Check that images used in the frontmatter, like
heroImage, show up properly and that the image paths in the body aren’t broken. - Build test: Even if everything works in
npm run dev, be sure to runnpm run buildonce before deploying. Errors that didn’t show up on the dev server often appear in the build.
Next time, I’ll actually pick a theme and walk through applying it to my blog. Bye!

Loading comments...